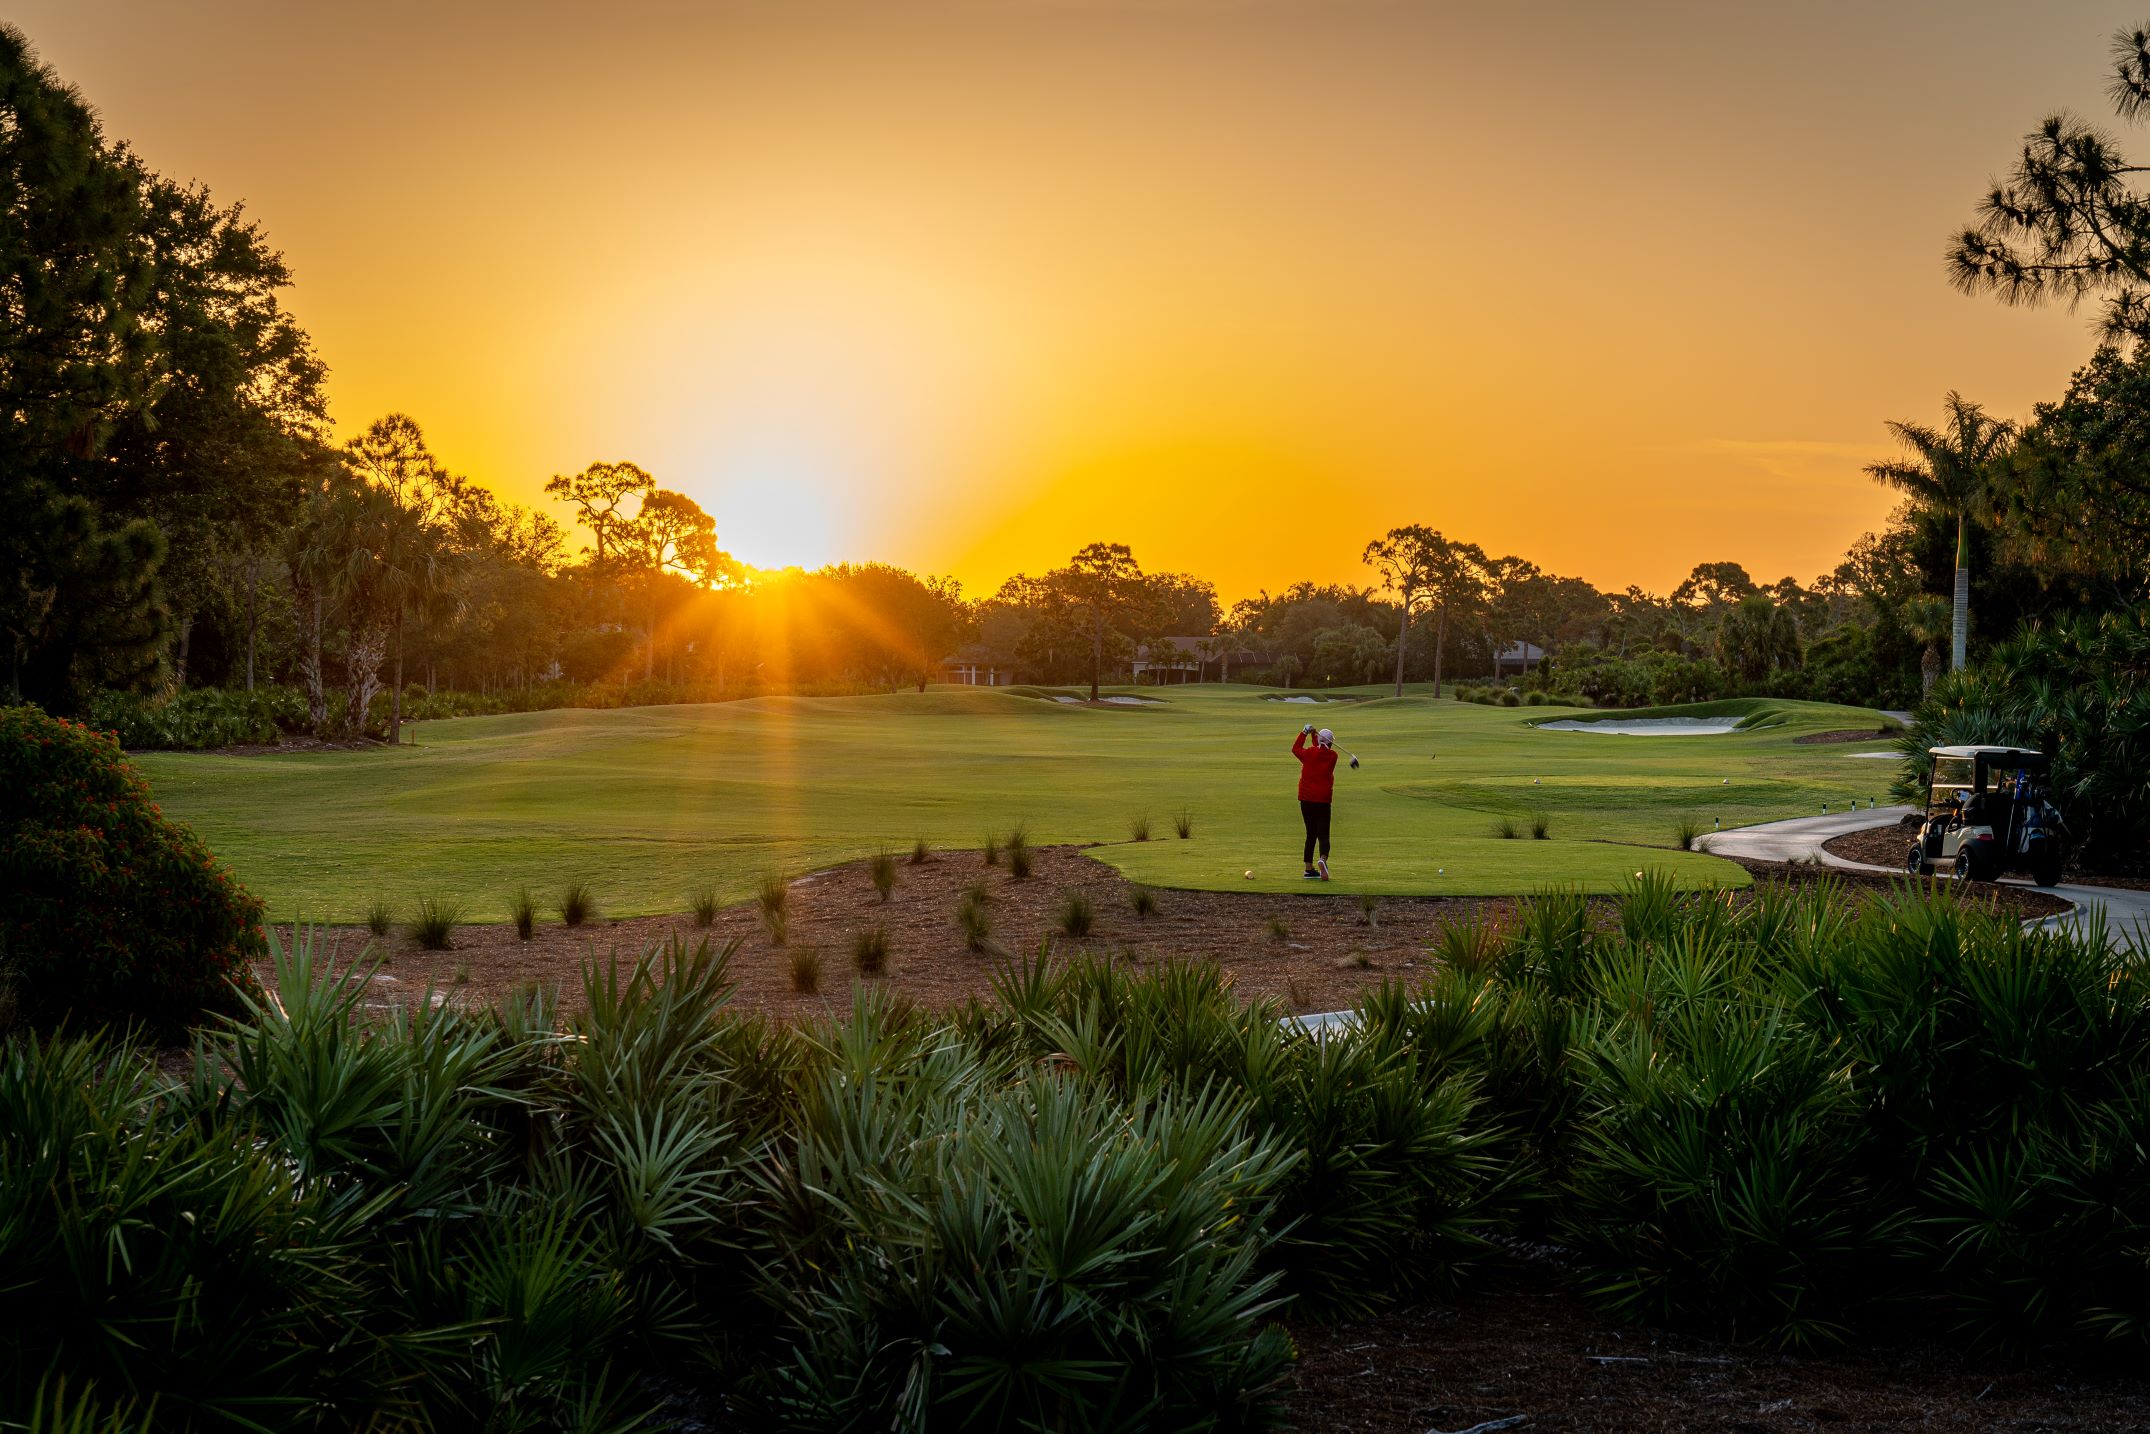
Course Tour
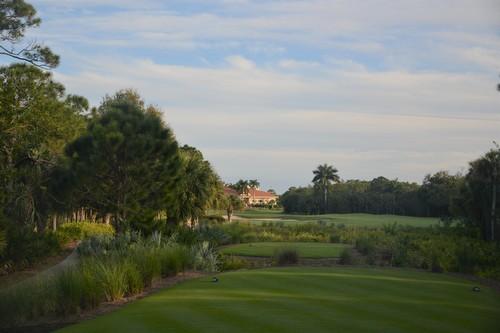
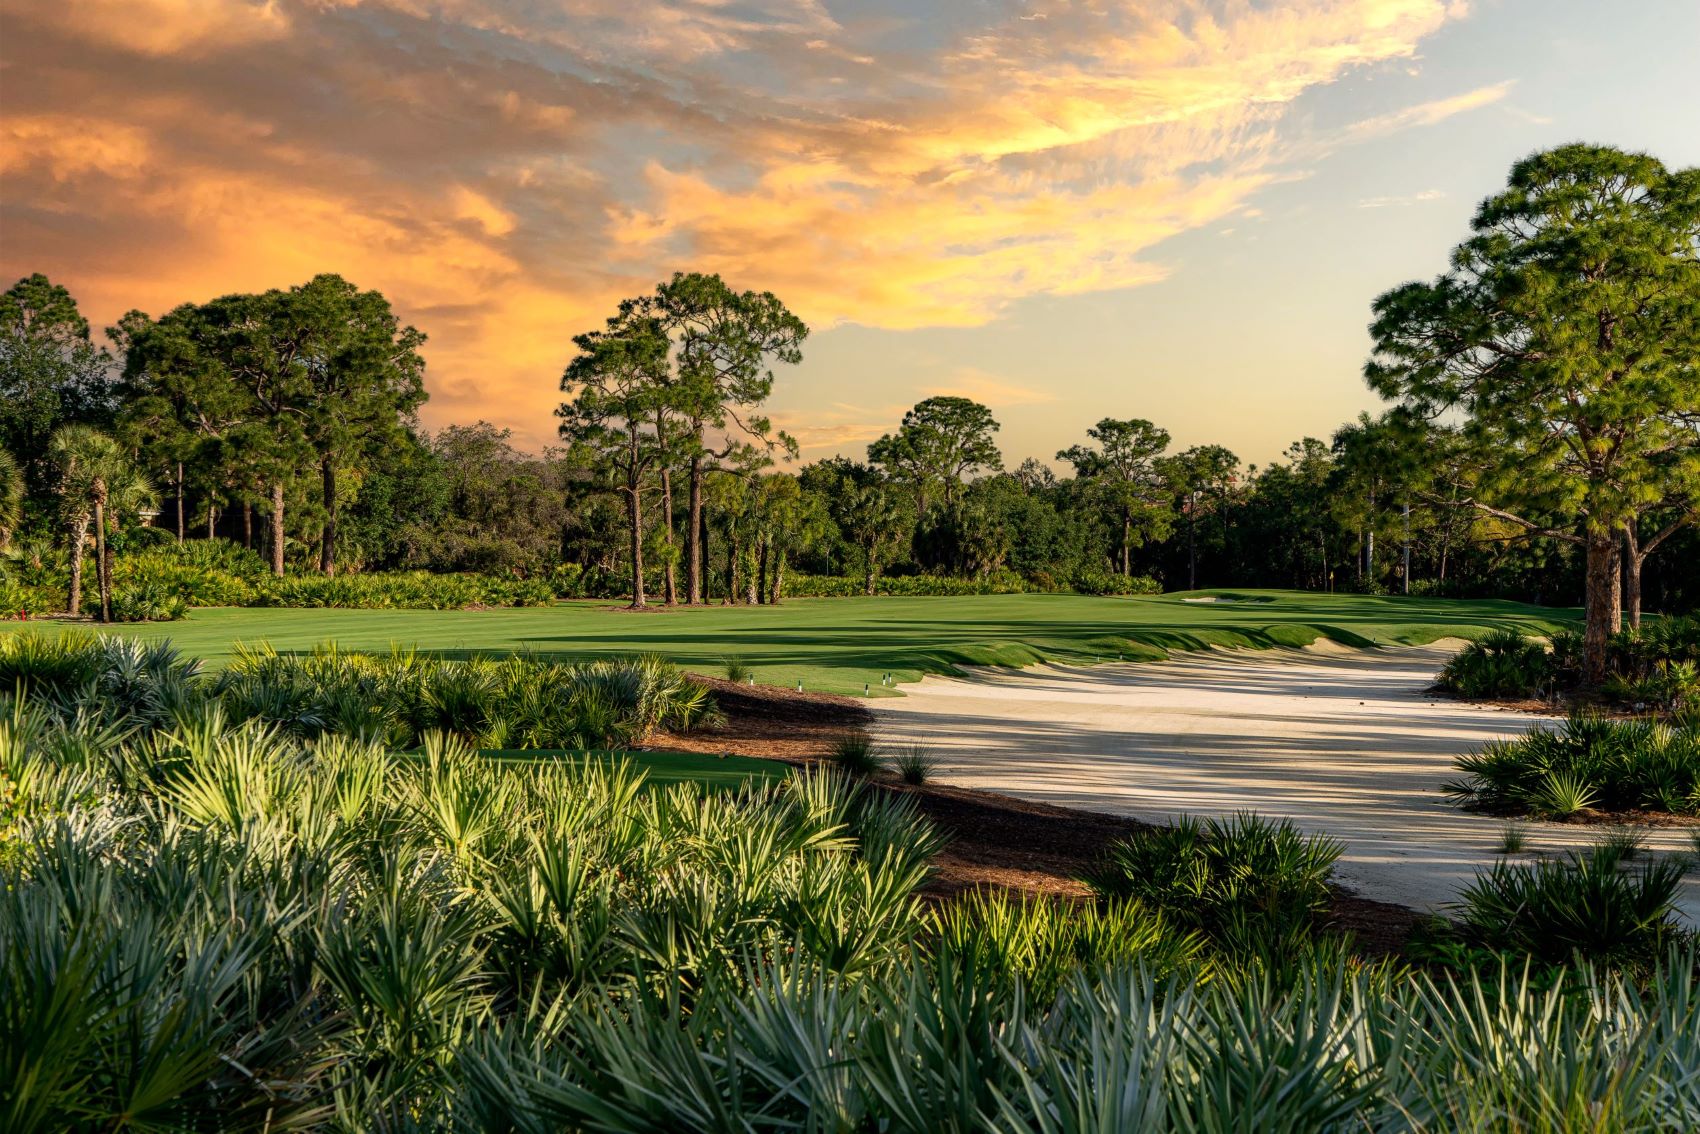
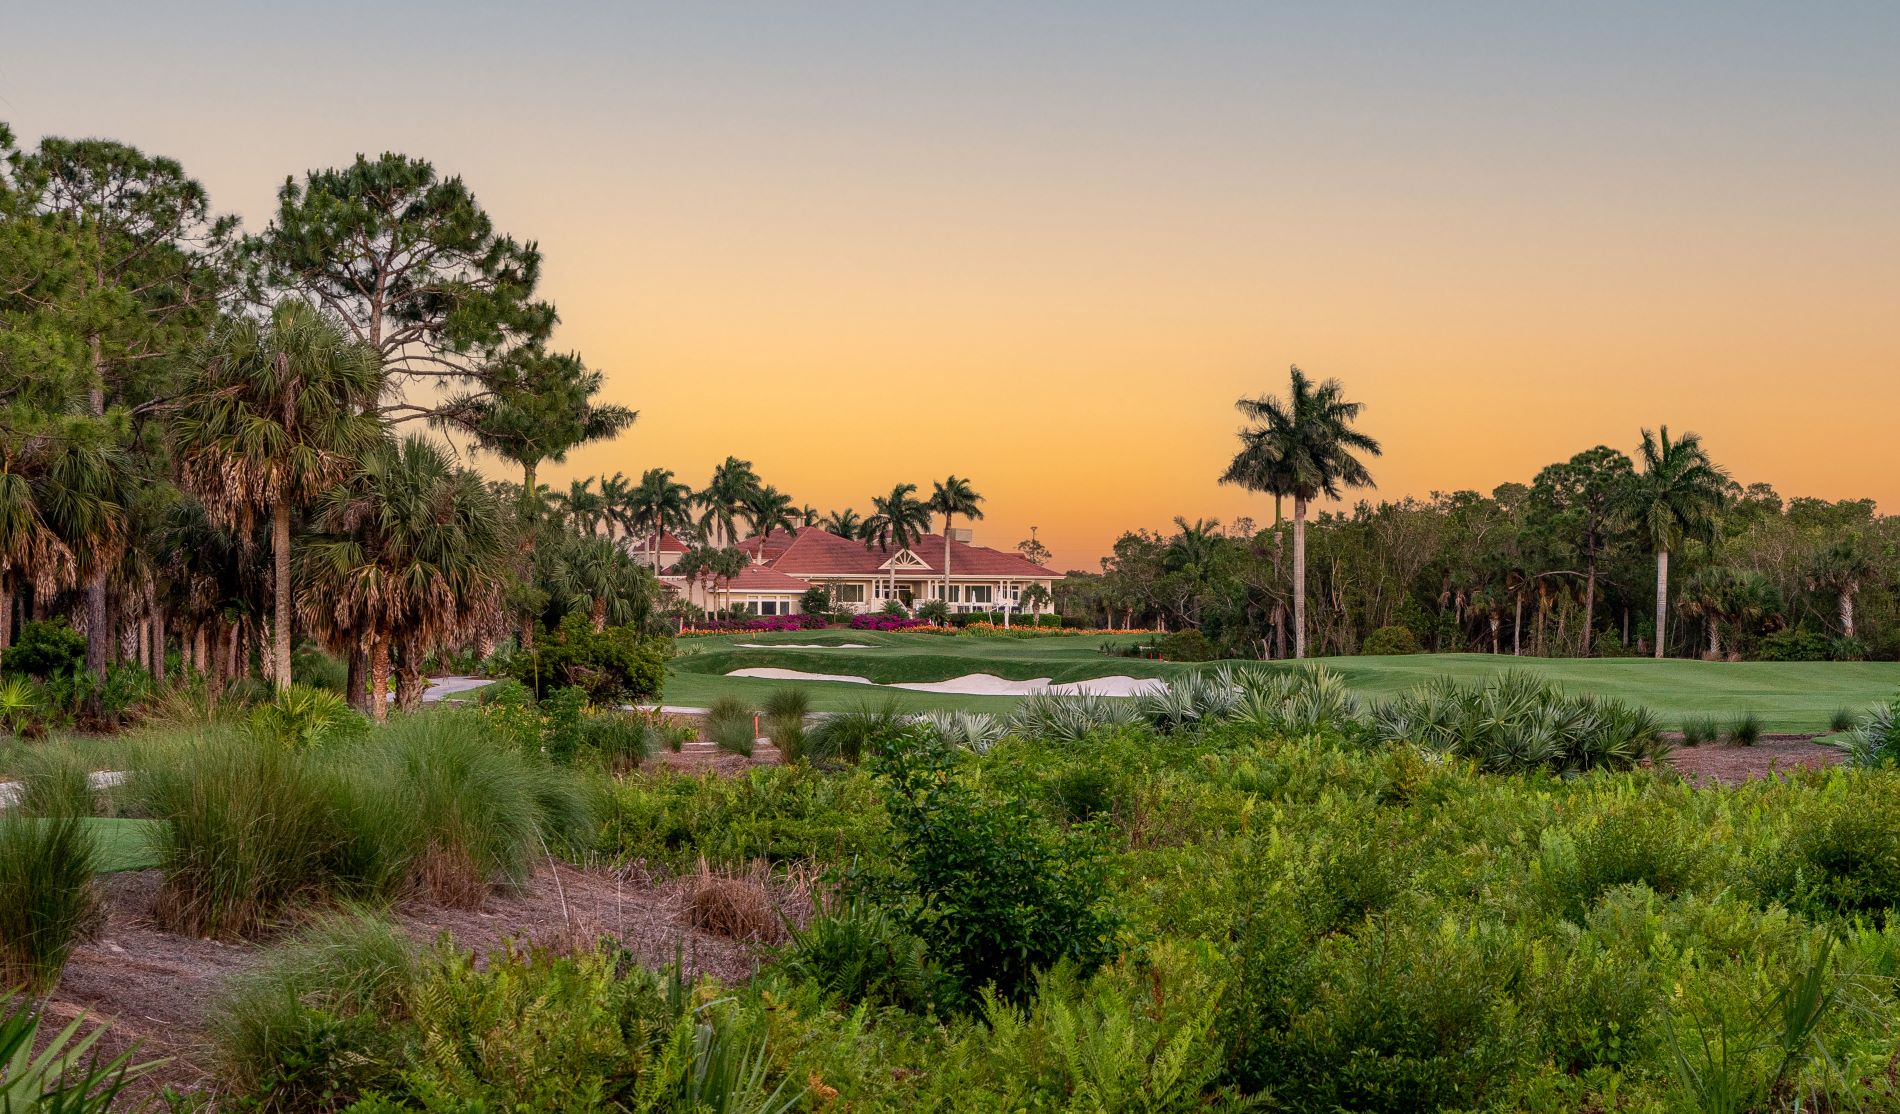
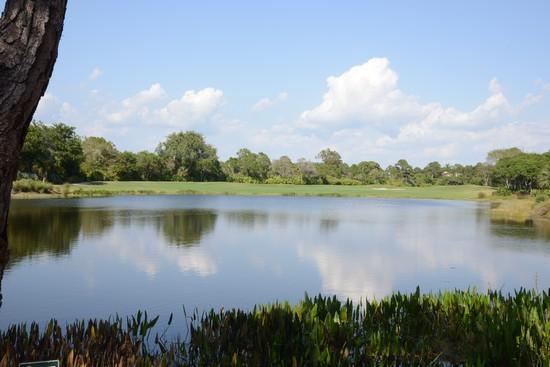
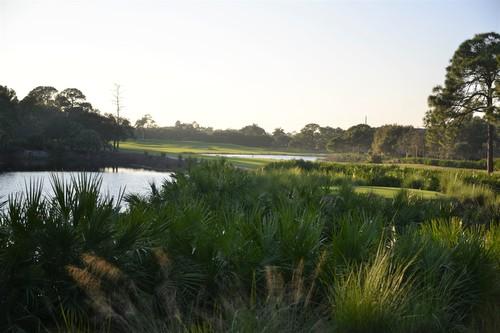
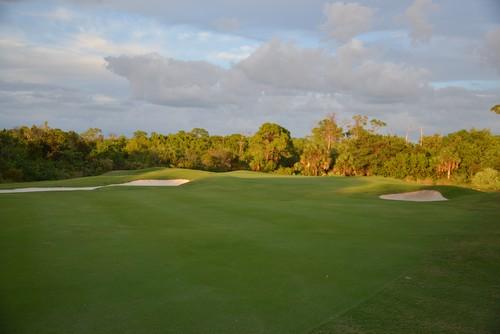
If you love golf, you will revel in the natural setting, wetland views, freshwater lakes, surrounding preserves and glimpses of Florida wildlife at Collier’s Reserve. Each hole has a distinct personality with spectacular views from every tee box.Playing at 6744 yards from the back tees with palmetto groves, Paspalum tees, TifEagle greens, Bermudagrass fairways and roughs, there are many holes that could be called “signature holes”, but when asked, the members usually mention holes #6, #12, #14 and #18.

| Tees | Yardage |
|---|---|
|
Tee I
|
421 |
|
Tee II
|
467 |
|
Tee III
|
477 |
|
Tee IV
|
487 |
|
Tee V
|
500 |
|
Tee VI
|
504 |
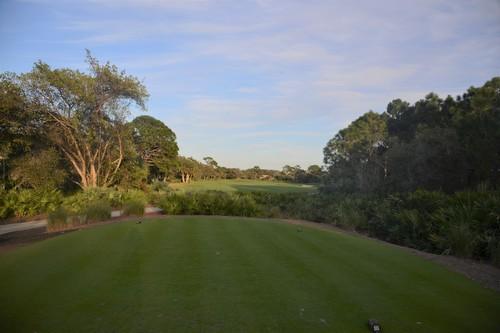
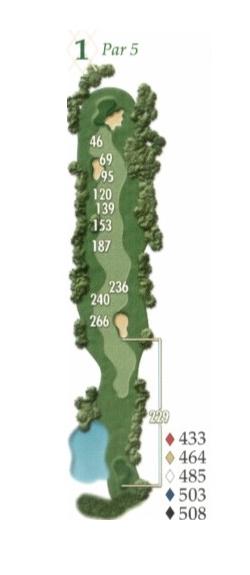
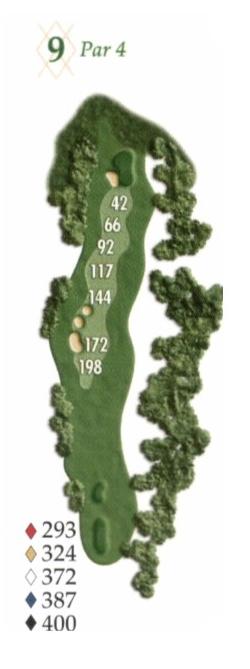
Welcoming players with one of the widest fairways on the course, this opening par 5 is a gentle start. From a well-placed tee shot, players can guide their second shot to a safe landing zone between a large pine, (seemingly in the middle of the fairway), and a palmetto grove. The third shot, to an uphill, narrow green requires careful placement. The sloping green demands cautious putting to walk away with a par.
| Tees | Yardage |
|---|---|
|
Tee I
|
329 |
|
Tee II
|
334 |
|
Tee III
|
362 |
|
Tee IV
|
375 |
|
Tee V
|
403 |
|
Tee VI
|
417 |
A long par 4, the second hole requires varying lengths of carry over an expansive palmetto grove to safely reach the fairway. Even with an exceptional and well-placed drive, players still have a long and challenging second shot to the uphill sloped green. The green, guarded on the left by a green-side bunker and on the right by undulating mounds, has a complicated grain that frequently defies logic.

| Tees | Yardage |
|---|---|
|
Tee I
|
224 |
|
Tee II
|
318 |
|
Tee III
|
326 |
|
Tee IV
|
335 |
|
Tee V
|
343 |
|
Tee VI
|
385 |
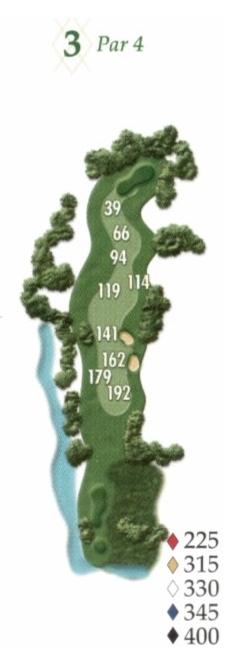
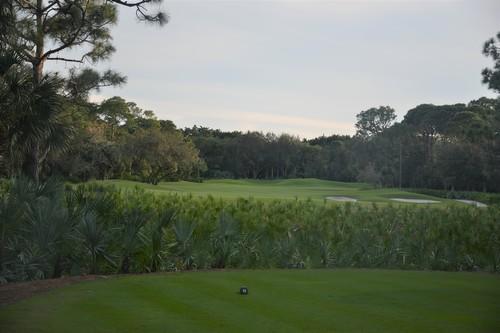
The park-like setting for this par 4 is a major variation from the long second hole. Although the yardage looks welcoming on paper, the large live oak along the left edge of the fairway and the heavily vegetated borders along the left and right sides demand accuracy from the tee. Players must hit a solid second shot to find a spot near the flag on this undulating, crowned green.
| Tees | Yardage |
|---|---|
|
Tee I
|
110 |
|
Tee II
|
131 |
|
Tee III
|
145 |
|
Tee IV
|
152 |
|
Tee V
|
162 |
|
Tee VI
|
168 |
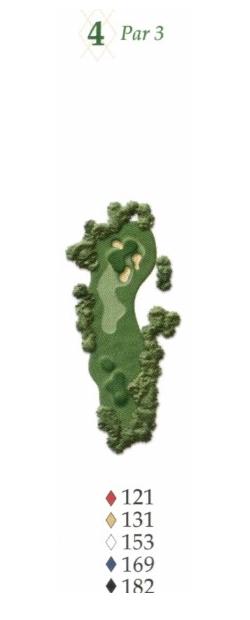
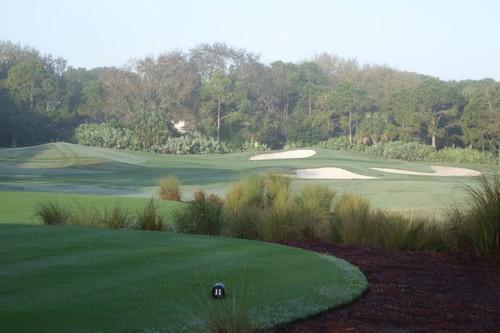
The first par 3 on the course is well-guarded by bunkers and mounds. Depending on the placement of the flagstick, nestling a shot close to the pin can be a real challenge. The green is heavily sloped from left to right and is also crowned in the center which can lead well-placed shots astray to the back or deny access from the front with an apron of sticky grass.
| Tees | Yardage |
|---|---|
|
Tee I
|
293 |
|
Tee II
|
303 |
|
Tee III
|
333 |
|
Tee IV
|
362 |
|
Tee V
|
370 |
|
Tee VI
|
390 |
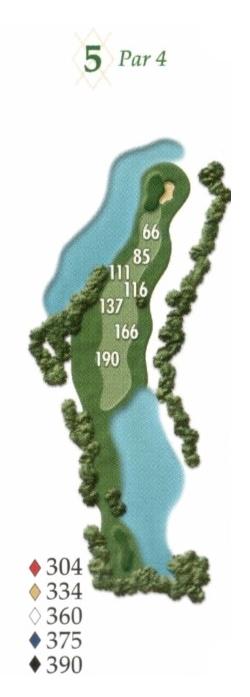
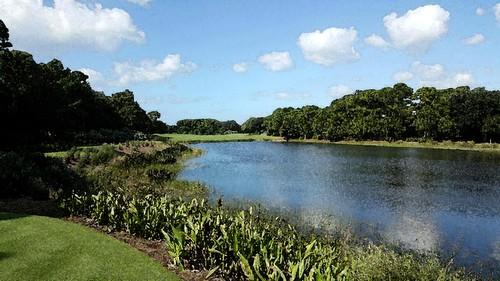
Accented by two small lakes and bordered by beautiful trees, this par 4 is a visual treat. Although the fairway appears wide, a shot to the right or left can end up in the palmetto groves or a long, left tee shot can be in the lake. The second shot to the green is challenged by a green that slopes to the lake on the left and a greenside bunker on the right. While this is one of the more level greens on the course, there is a distinct spine that creates conflicting breaks for putts.
| Tees | Yardage |
|---|---|
|
Tee I
|
323 |
|
Tee II
|
333 |
|
Tee III
|
362 |
|
Tee IV
|
392 |
|
Tee V
|
421 |
|
Tee VI
|
462 |
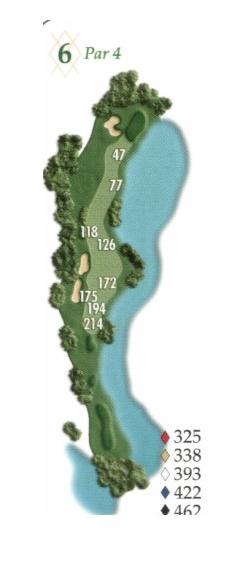
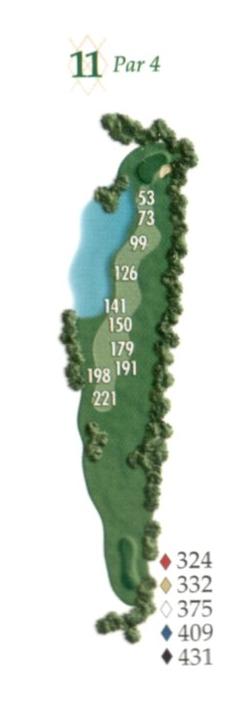
The main feature on this long par 4 is the large lake that comes into play along the entire length of the right side. The green is nestled tight to the water and has a large bunker at its left front. This brute is easily rated as the most difficult hole at Collier's Reserve. However, members go one step further and call it "the most challenging hole in Collier County!" It's a fantastic golf hole and a genuine test of one's skills.

| Tees | Yardage |
|---|---|
|
Tee I
|
117 |
|
Tee II
|
125 |
|
Tee III
|
160 |
|
Tee IV
|
173 |
|
Tee V
|
188 |
|
Tee VI
|
193 |
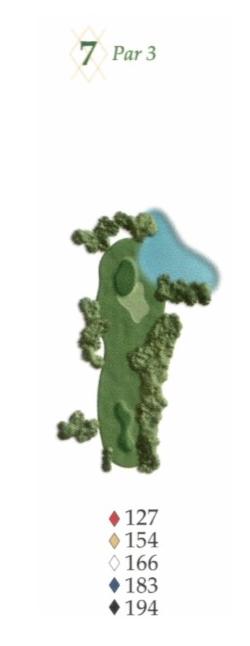
This charming par 3 has many hidden treasures. While the right-side water views are lovely, the heavily sloped green can carry a well-placed shot from the far-left side of the green down to the water's edge. Adding to the complexity, left side undulations on the green and greenside can trap a ball or funnel it directly to the back of the green. Depending on the day, breezes from lake can make a significant change in your club selection.
| Tees | Yardage |
|---|---|
|
Tee I
|
406 |
|
Tee II
|
419 |
|
Tee III
|
445 |
|
Tee IV
|
473 |
|
Tee V
|
480 |
|
Tee VI
|
489 |
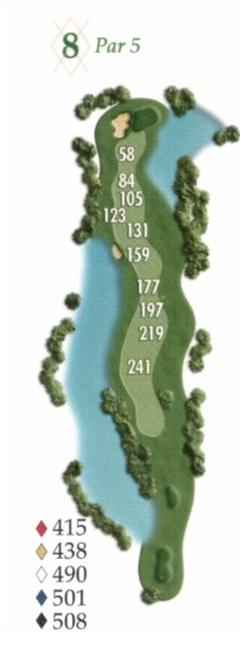
This challenge of this par 5 rests in the serpentine bend of the fairway, bunkers adjacent to landing spots, and the lakes on both sides of the fairway. The length of the hole allows players to reach the green in regulation, if the tee and second shot are well-placed. The approach shot demands accurate placement to avoid the strong slope to the lake at the right side of the green. Speed of the green and degree of break varies greatly depending on the location of the flagstick.
| Tees | Yardage |
|---|---|
|
Tee I
|
290 |
|
Tee II
|
322 |
|
Tee III
|
333 |
|
Tee IV
|
370 |
|
Tee V
|
391 |
|
Tee VI
|
399 |
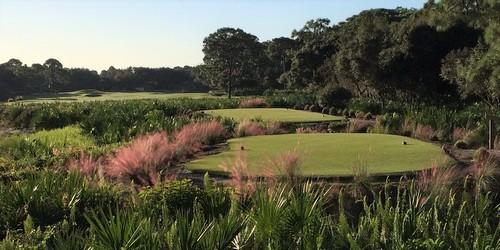
The closing hole of the front 9 is a gently curving par 4. The landing area opens significantly to the right side but is well guarded by a bunker, mounds and a wooded palmetto grove on the left side. Second shots are a challenge with a raised entryway, left-side bunker, and out of bounds to the right. Although this par 4 can be reached in regulation, the multi-level, sloping green is the most challenging aspect of this hole.
| Tees | Yardage |
|---|---|
|
Tee I
|
285 |
|
Tee II
|
323 |
|
Tee III
|
334 |
|
Tee IV
|
357 |
|
Tee V
|
390 |
|
Tee VI
|
419 |
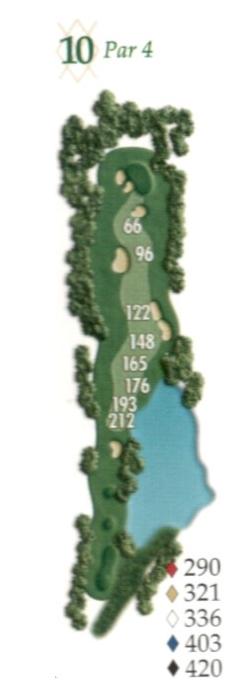
Serenely situated next to a pond, the tee boxes for this par 4 have a clear view to the elevated green in the distance. Tee shots must be guided to a narrow alley flanked by two fairway bunkers. Although second shots are not long, they must find their way to an elevated green with run-off slopes in all directions. Front side bunkers guard the green on both the left and right, creating a very narrow entry to this small target.
| Tees | Yardage |
|---|---|
|
Tee I
|
319 |
|
Tee II
|
325 |
|
Tee III
|
360 |
|
Tee IV
|
368 |
|
Tee V
|
407 |
|
Tee VI
|
426 |
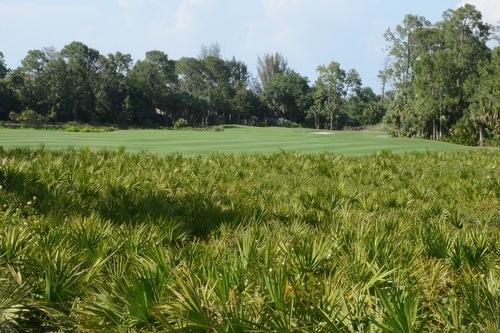
This visually intimidating par 4 offers abundant challenge. From the tees, players must carry shots over a significant field of palmettos. Although a lake borders the left side of the fairway, the landing spot for tee shots is comfortably wide. Second shots require length and accuracy. The well-guarded green has an uphill sloped entry and a right-hand bunker. Any shots to the left side of the green can find their way to the lake or a challenging lakeside grove of trees. The final putts on this narrow kidney-shaped green offer plenty of slope and challenge.

| Tees | Yardage |
|---|---|
|
Tee I
|
108 |
|
Tee II
|
138 |
|
Tee III
|
148 |
|
Tee IV
|
159 |
|
Tee V
|
172 |
|
Tee VI
|
179 |
The 12th hole is another signature hole at Collier's Reserve. One of the most beautiful golf holes in Florida, it is often compared to trying to land your golf ball on a kitchen table. The highly-elevated green is sloped slightly back to front with two deep bunkers on the right, one on the left and another deceptively placed at the left front corner. This challenging par three is frequently referred to as "the easiest par 5 on the course".

| Tees | Yardage |
|---|---|
|
Tee I
|
390 |
|
Tee II
|
439 |
|
Tee III
|
444 |
|
Tee IV
|
490 |
|
Tee V
|
526 |
|
Tee VI
|
523 |
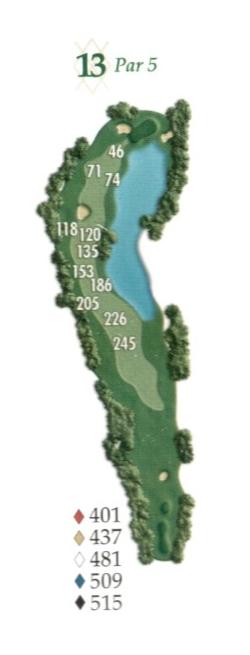
The tee box views of this spectacular par 5 are stunning. With a severe dogleg-right, tee shots and second shots must be thoughtfully placed. The narrow landing alley for tee shots is flanked by a small lake and out-of-bounds on the left. A larger lake on the right side of the hole is in play for all three shots. The small sloped green is nestled between two lakes and a front-side bunker. Always filled with visiting birds, this hole is one of the most picturesque and classic "Audubon" holes on the course.
| Tees | Yardage |
|---|---|
|
Tee I
|
247 |
|
Tee II
|
254 |
|
Tee III
|
315 |
|
Tee IV
|
324 |
|
Tee V
|
333 |
|
Tee VI
|
340 |
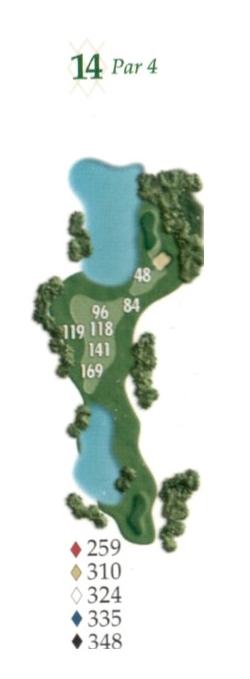
The 14th hole, a short par four, is Arthur Hills' favorite hole on the course because it demands two precisely-placed golf shots. The approach to the green will be much easier if the tee shot is accurate. The second shot, over water and the guardian bulkhead, must find a soft landing spot on a very narrow green that slopes to the water. The 14th is a birdie hole that can easily turn into a double-bogey hole.
| Tees | Yardage |
|---|---|
|
Tee I
|
307 |
|
Tee II
|
319 |
|
Tee III
|
325 |
|
Tee IV
|
362 |
|
Tee V
|
377 |
|
Tee VI
|
398 |
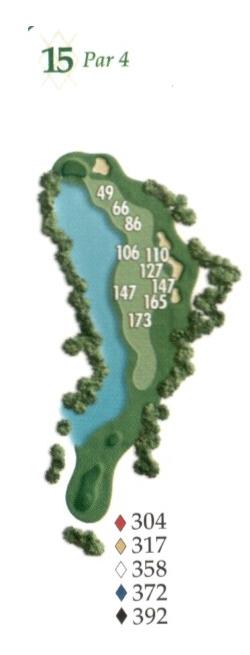
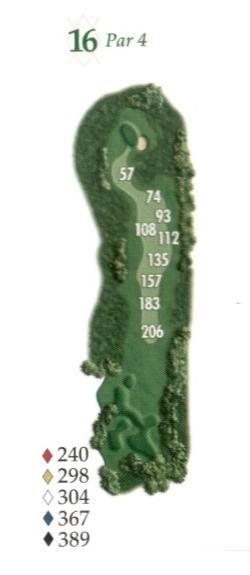
Accurate tee shots set the stage on this dogleg left par 4. Selecting a tee shot target between the left side lake and the right side out-of-bounds is critical. Adding complexity, there are also several fairway bunkers in the target landing zone. Players can be faced with a challenging second shot over the lake or a shot to a narrow alley between the lake and the bordering palmetto groves. Reaching the green in regulation is a test of skill and fortitude.
| Tees | Yardage |
|---|---|
|
Tee I
|
220 |
|
Tee II
|
290 |
|
Tee III
|
295 |
|
Tee IV
|
347 |
|
Tee V
|
363 |
|
Tee VI
|
375 |
Depending on the tee box, this par 4 can offer significant visual intimidation. The fairway landing zone is ample, but shots must be well-placed. Second shots require carry over a menacing preserve area before they hit the small target green
| Tees | Yardage |
|---|---|
|
Tee I
|
111 |
|
Tee II
|
114 |
|
Tee III
|
130 |
|
Tee IV
|
136 |
|
Tee V
|
144 |
|
Tee VI
|
146 |
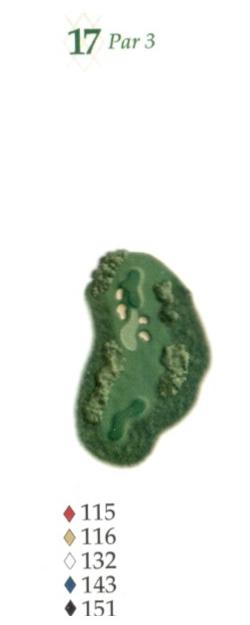
Historically, this pretty par 3 registers the largest number of hole in ones. Bunkers dot the front of the green on both sides and there is a drop-off area to the right of the green. But, with a straightforward tee shot, and a green that slopes uphill from front to back, players have a good chance to hit the green. Depending of the placement of the flagstick, putts can have a serious downhill slope. The 17th is a nice break before the challenge of the final hole.
| Tees | Yardage |
|---|---|
|
Tee I
|
401 |
|
Tee II
|
435 |
|
Tee III
|
465 |
|
Tee IV
|
497 |
|
Tee V
|
512 |
|
Tee VI
|
531 |
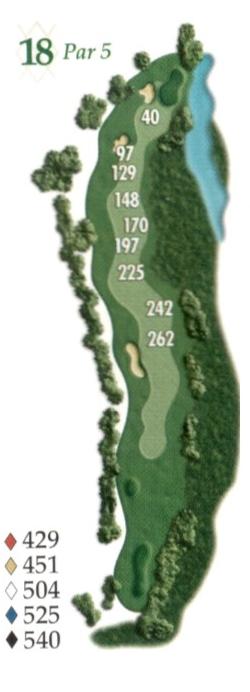
This finishing hole is a serpentine, double-dogleg par five, with carry over palmettos to a landing area that is framed by a left side fairway bunker. The landing area for the second shot is just short of another fairway bunker on the left, leaving an approach shot of approximately 100 yards into the green. The left front of the elevated 18th green is guarded by a bunker. The right side and back of the green brings the Cocohatchee River into play, so don't go astray with your approach shot to this two-tiered green.